Vancouver 2010 Olympics
I got around to uploading some photos from our Olympic experiences here. Unsorted and raw, straight from the camera. Enjoy!
| S | M | T | W | T | F | S |
|---|---|---|---|---|---|---|
| 1 | 2 | |||||
| 3 | 4 | 5 | 6 | 7 | 8 | 9 |
| 10 | 11 | 12 | 13 | 14 | 15 | 16 |
| 17 | 18 | 19 | 20 | 21 | 22 | 23 |
| 24 | 25 | 26 | 27 | 28 | 29 | 30 |
I got around to uploading some photos from our Olympic experiences here. Unsorted and raw, straight from the camera. Enjoy!
 The Canadian Royal Mint hosted a pavilion for Olympic visitors to Vancouver for the 2010 Games. The Mint you say? How could that be interesting? I had exactly the same question, initially. The pavilion is down the street from my office so I see what is going on outside every day. And every day the lines have been getting longer. By mid-day the wait to enter is six hours or more.
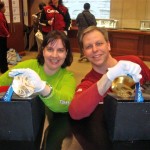
Turns out they are showing off the medals created for the Olympic event winners. If you wait in line, you can see and hold the medals. How could I resist? Eileen and I went early, lined up at 7am and waited two hours in order to enter. We had fun in line, talking with other people who were equally interested. The people at the front of the line arrived an hour before we did. The picture here is us with the gold and silver medals on display. We also saw the Paralympics medals.
Some interesting trivia about the medals we learned during our visit to the Canadian Royal Mint pavilion:
It was truly a once-in-a-lifetime opportunity and well worth the wait to get in to see these fabulous artworks.
 Today is the opening ceremonies here in Vancouver and the Olympic torch has been touring around town. This morning it went by very close to my office so I just had to go see it. Very, very neat to see the flame as well as see how many people came out to see it too. Quite exciting here in Vancouver these days, the city is really jumping. Here is a link to the video I got with my phone, enjoy!
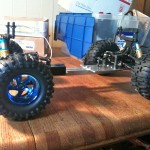
 This weekend I managed to spend some time preparing the “backbone” of my outdoor Robo-Magellan robot. Basically I drilled and tapped some holes in extruded aluminum angle stock. I ended up creating a jig on my Sherline mill so it was just a matter of clamping down each piece and run the program to drill the right holes.
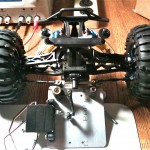
Here is another picture, from the top, that shows the two plates connected together before mounting the second set of wheels.
Next up is to machine motor mounts then construct an upper deck. Hopefully I’ll get some time soon to tackle those challenges.
 Between work, the holidays, and moving to a new house I’ve had little opportunity to work on my Robo-Magellan outdoor robot. That changed yesterday where I spent about five hours machining up two base plates for it. My little Sherline mill doesn’t have the working envelope to do the whole thing in one piece, so I decided to create two plates connected together.
Here is a picture of what each plate looks like after a quick cleanup (with the original base plate from the RC truck included).
Yesterday’s work produced the two plates, including countersunk holes for some mounting points, just like the original. I’m really happy with the progress made so far, but there is much left to do even to get the mechanical stuff done. Next up will be to make the connecting rods that will form the spine, then to make the motor mounts. Lastly I need to create a new top deck that will hold the electronics and sensors.
As for the brain, I opted for a Gumstix Overo Air module with a Tobi carrier board. This seemed to be a good tradeoff for weight, power consumption, and capability. I also bought a motor controller and servo controller from Pololu.
I need to find a good polymer battery to provide power for everything, hook up some sensors, write some software, etc. but I’m really happy with the progress this weekend.